
Kimberly not only paints beautiful canvases and stitches them like no other but she has her own very special way of finishing them! She graciously shared this info on her blog and I’m sharing it here to. It’s super cool and totally doable!
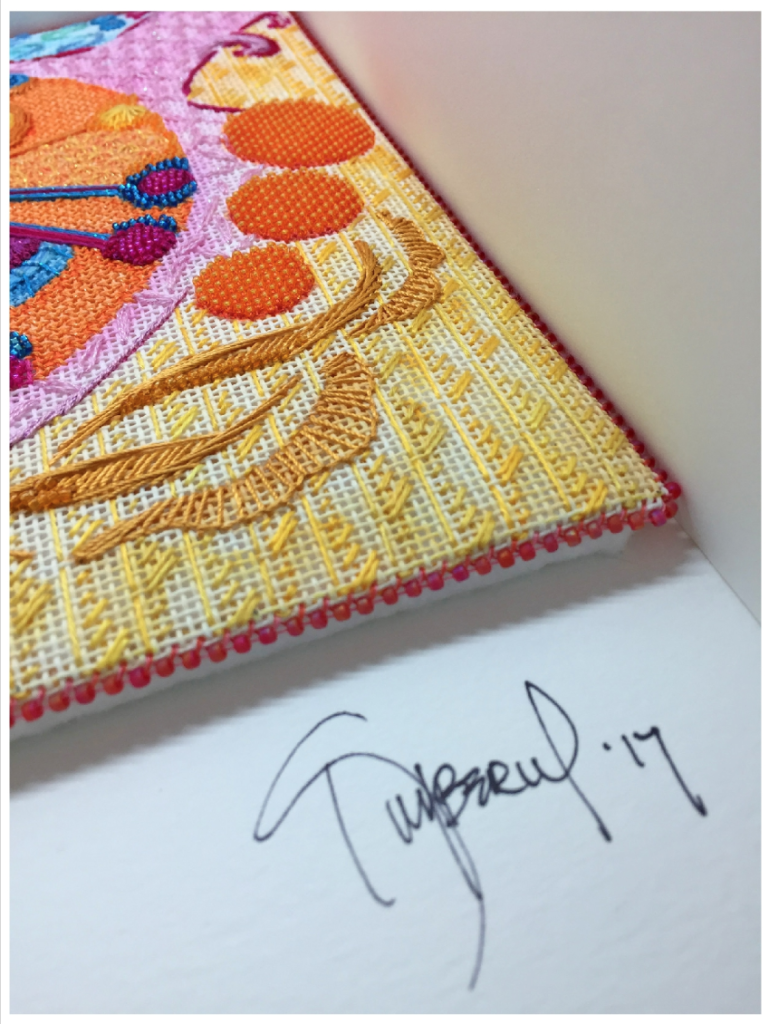
Here’s her technique for a beaded edge to finish off your beautiful needlepoint.
This is a technique she developed years ago when she did all charted work and wearable art pins.
The edge of beads provides the perfect folding line.
Use size 11 beads with matching beading thread.
(tip…She always waxes her beading thread and she uses a short John James ball point size 10 beading needle.)

Follow steps one and two as charted.


Next, trim away excess canvas, leaving about an inch plus all the away around as in the first photo. Now miter the corners and fold in the sides. Lightly press with a warm iron. This does not require you to mash with the iron, there is enough sizing in your canvas that lightly pressing will hold it in place.

Insert a piece of felt under the folded edges. This adds some extra depth to the piece and it hides the folded edges from being seen through any openness in your work.

Mount this on covered acid free foam core, cut about 1/4″ smaller than beaded edge piece. The center picture above shows the felt being attached. Kimberly uses white glue for this, let it dry completely. The last step is to attach the stitched piece to the board. This is accomplished with clear or white nylon thread. This enables you to sew through the edges of your piece without the stitches showing. Sew through piece and just the edge of the foam covered board. Now you can hand this all to your framer to mount on a backing board [She uses the same white glue for this.] Kimberly came up with this so that there is no glue on her needlework! Her pieces float beautifully in the shadow boxes she uses for framing.

Tada! Beautiful contemporary framing and you did it yourself.
Thank you Kimberly for sharing this technique.
xo
ruth

Marvelous re share, thank you ❤️
Thank you this!
This is a wonderful set of instructions! Having the photos and stitching instructions is great for those of us who don’t handle such things well.
I have a completed design that I was about to send out for finishing, but you’ve given me a way to do it myself with little to no fear. Thank you.
Gives me ideas for finishing other projects. Thanks .
Ruth another amazing effort on your part.
Thank you, but this is totally Kimberly’s magic. I just reposted it with her permission.
What a beautiful edge & mounting technique! Will definitely use it on “Cottage or Condo”.
Fabulous
thanx SO MUCH for sharing this framing technique; it looks awesome!
Absolutely Beautiful! The finishing is very unique!LOVE IT!
WOW! So beautiful.
Thank you for sharing!